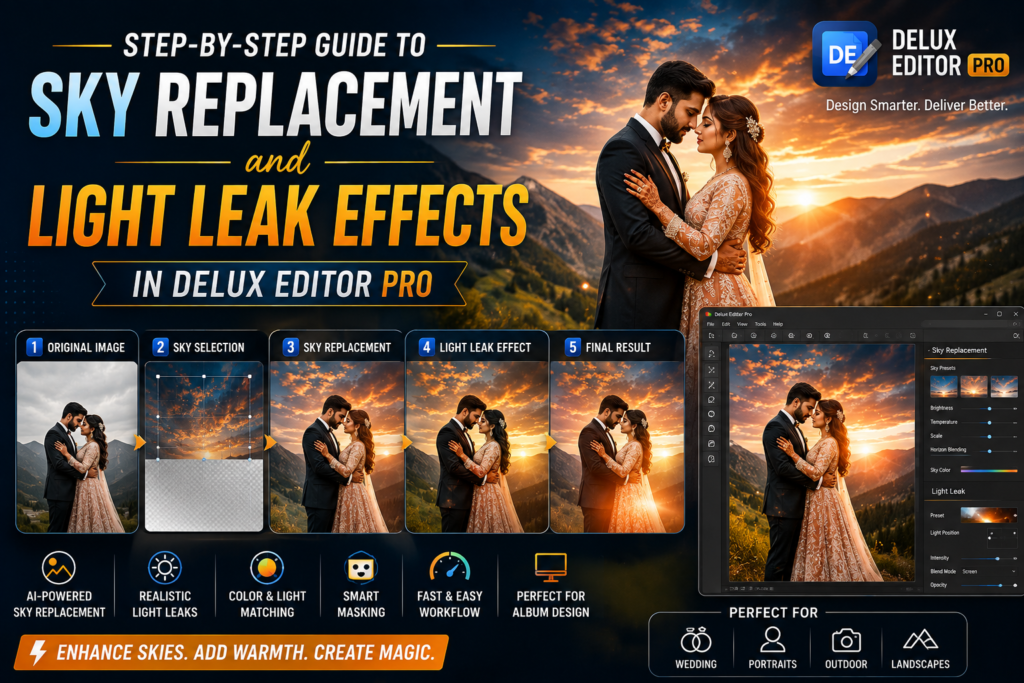

Sky Replacement is a powerful photo editing technique that can transform an ordinary image into a more dramatic and professional-looking photograph. With Delux Editor Pro, photographers and album designers can improve skies, enhance lighting, and add creative light leak effects without spending hours on manual editing.
Moreover, combining a realistic sky with carefully controlled light effects can give wedding photos, portraits, travel images, and outdoor photographs a cinematic appearance. In this guide, you will learn how to use Sky Replacement and light leak effects step by step in Delux Editor Pro.
Why Use Sky Replacement in Delux Editor Pro?
A dull or overexposed sky can reduce the visual impact of an otherwise beautiful photograph. Therefore, replacing the sky can immediately improve the overall composition.
Delux Editor Pro can help designers create a more balanced image by combining the original foreground with a more attractive sky. In addition, the technique can be useful when working with wedding album photographs, outdoor portraits, landscapes, and event photography.
The main benefits include:
- Better-looking skies
- More balanced compositions
- Improved photo atmosphere
- Faster creative editing
- More professional album designs
- Greater control over the final appearance
Step 1: Import Your Photograph
First, open Delux Editor Pro and import the photograph you want to edit. Choose an image where the sky is clearly visible and the main subject is separated reasonably well from the background.
For the best results, use a high-resolution photograph. Consequently, the final image will retain more detail when it is exported for printing.
Step 2: Select the Sky Replacement Tool
Next, open the sky editing or background replacement options in Delux Editor Pro.
Choose a suitable replacement sky based on the original lighting conditions. For example, a warm sunset sky works well with golden-hour photographs, while a bright blue sky is more suitable for daytime images.
At this stage, avoid choosing a sky that looks dramatically different from the original lighting. A realistic match will usually produce a better result.
Step 3: Position and Adjust the New Sky
After selecting the replacement sky, adjust its position and scale to match the photograph.
Pay particular attention to the horizon. The sky should blend naturally behind buildings, trees, people, mountains, or other foreground objects.
Furthermore, adjust brightness, contrast, saturation, and color temperature when necessary. These adjustments help the new sky match the rest of the photograph.
Step 4: Refine the Sky Mask
A clean mask is essential for realistic Sky Replacement.
Zoom into areas around hair, trees, leaves, buildings, and other detailed objects. Then refine the selection wherever the original background is still visible.
For wedding photography, pay special attention to hair, clothing edges, decorations, and outdoor backgrounds. Small masking errors can become noticeable when the photograph is printed at a large size.
Step 5: Match the Overall Lighting
Once the new sky is positioned correctly, match its lighting with the foreground.
For instance, a bright sky combined with a dark subject can make the image appear unnatural. Instead, slightly adjust highlights and shadows so both elements appear to belong to the same scene.
You can also fine-tune:
- Exposure
- Highlights
- Shadows
- Contrast
- Temperature
- Saturation
- Color balance
As a result, the replacement becomes much more convincing.
Step 6: Add Light Leak Effects
After completing the sky adjustment, add a light leak effect to create additional atmosphere.
Light leaks can simulate soft rays of light entering the camera lens. They work particularly well with wedding portraits, sunset photographs, creative portraits, and cinematic album pages.
However, use the effect carefully. A subtle light leak often looks more professional than an extremely strong effect.
Step 7: Adjust Light Leak Opacity
Now reduce the opacity of the light leak until it blends naturally with the photograph.
Position the effect near the direction of the main light source. For example, if the sun appears on the left side of the image, place the light leak around that area.
This simple adjustment can make the effect appear more realistic.
Step 8: Combine Color and Light
The final step is to balance the sky, foreground, and light leak together.
If the sky has warm orange tones, consider adding a slightly warm color treatment to the foreground. Similarly, a cool blue sky may work better with cooler shadows.
This process creates visual consistency across the entire photograph.
Sky Replacement Tips for Wedding Album Designers
Wedding photographers and album designers can use this technique to create stronger storytelling images.
For example, a plain outdoor background can be transformed into a sunset scene. Similarly, a cloudy sky can be replaced with a brighter environment to give the photograph a more cheerful appearance.
When designing a complete wedding album, consistency is especially important. Therefore, try to maintain similar color tones and lighting styles across multiple pages.
Common Mistakes to Avoid
Even though the process is simple, several mistakes can reduce the quality of the final image.
Using an Unrealistic Sky
A replacement sky should match the original photograph’s perspective and lighting. Otherwise, the result may look artificial.
Overusing Light Leaks
Too much light can hide important details. Instead, use a low-opacity effect and gradually increase it until you achieve the desired result.
Ignoring Hair and Fine Details
Poor masking around hair and trees is one of the easiest ways to make a composite look fake. Always zoom in and refine these areas.
Forgetting Color Matching
The sky and foreground should share a similar color atmosphere. Therefore, always perform a final color adjustment before exporting.
Create Professional Album Photos Faster
The combination of Sky Replacement and light leak effects can make ordinary photographs much more visually appealing. More importantly, Delux Editor Pro provides a workflow that can help album designers complete creative edits faster.
You can also explore other editing techniques on your website, such as AI Color Correction, AI Retouching, and Advanced Studio Tools. These related techniques can be combined to create a more complete photo editing workflow.
For information about professional color and image-editing standards, you can also refer to resources from Adobe Photoshop.
Final Thoughts
Sky Replacement is an effective way to transform the mood and appearance of a photograph. When combined with carefully controlled light leak effects, it can create a polished and cinematic result.
Most importantly, realistic editing depends on balance. Match the lighting, refine the mask, control the effect intensity, and maintain consistent colors. With practice, Delux Editor Pro can become a useful part of a fast and creative wedding photography editing workflow.